Setting up your oscilloscope's input coupling and how display signal size is controlled are covered in part two of this five-part series, along with a discussion of how the signal is digitized, stored, and checked for glitches.
You can view the first installment of this series at ABCs of Portable Oscilloscopes: Part 1, Multimeters and Oscilloscopes. You can also view the complete webinar with audio and animations at the Fluke Training Center.
Architecture
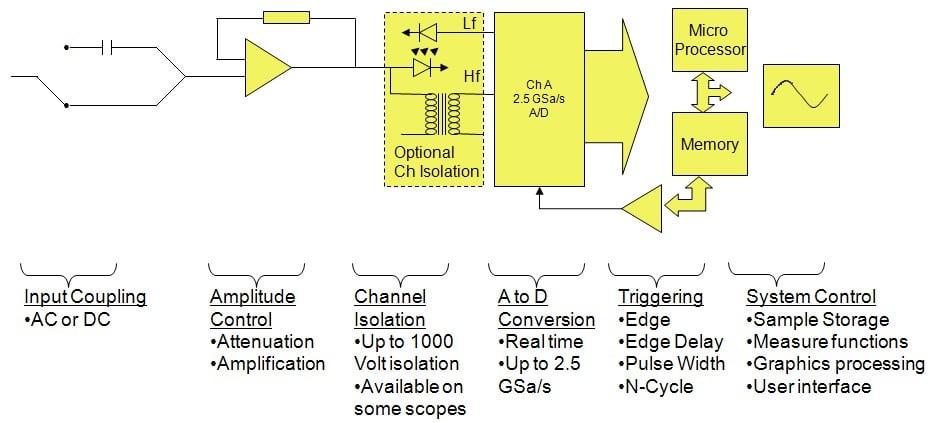
Let's start with quick overview of a digital oscilloscope's architecture. This will familiarize you with the key functions that control the acquisition and display of a waveform trace (the line that the oscilloscope draws in its display.
The block diagram in Figure 1 shows that a signal is first passed through two signal conditioning circuits: the input coupling section and the amplitude control section.
(For differential measurements - a measurement in which two signals are fed into the oscilloscope and the difference between them is displayed - some oscilloscopes also have channel-to-channel isolation.)
The Input Coupling section determines whether the signal is coupled (that is, connected) directly into the oscilloscope or whether is passed through a coupling capacitor, which blocks any DC in the signal.
The Amplitude Control section controls the size of the input signal. It can attenuate large signals (that is, make them smaller) or amplify small signals according to the settings you make on the front panel.
Together, the input coupling section and the amplitude control section condition the input so that the signal that is applied to the oscilloscope's analog-to-digital converter (ADC) has the desired characteristics and can be processed and displayed correctly.
Input Coupling
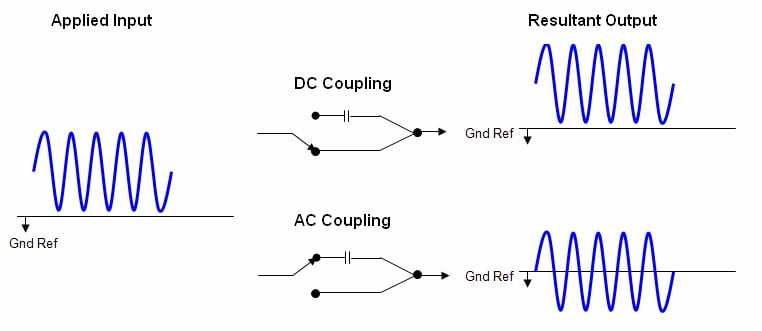
When you choose AC input coupling, the signal is connected to the oscilloscope through a coupling capacitor (see Figure 2) so that any DC component of the signal is blocked. Only the AC part of the signal is processed and displayed by the oscilloscope, centered around the zero volts point on the display.
When you choose DC coupling, the signal is coupled directly into the scope, bypassing the input coupling capacitor, so that both the AC and DC components of the signal are processed and displayed.
If you are not sure whether the signal that you are looking at has a DC component, you can switch the input coupling settings between AC and DC to see if the signal has a significant DC offset. (If DC offset is present, the signal trace will "jump" to a new vertical position to when you toggle the input coupling. How big a jump there is depends on the amount of DC offset.)
In some cases (for example, when you are looking at the DC output from a voltage regulator) you may want to start with DC coupling and then switch to AC coupling. In this example, after you check the DC level of the signal using DC coupling, you switch to AC coupling and increase the vertical sensitivity to look for any AC noise on the DC signal.
Display Amplitude Control
After the signal has been "conditioned," it is sampled and converted to a digital representation that is stored in the oscilloscope's memory. After the signal is digitized, it can be further manipulated - by calibrating the data points, performing mathematics, and so on - and eventually displayed as a trace on the screen.
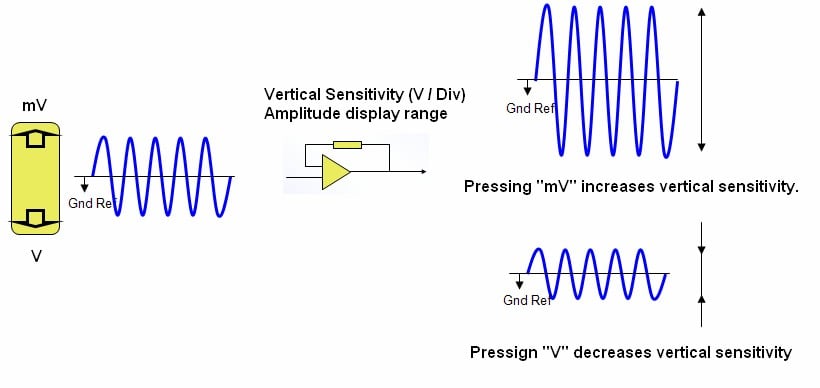
The amplitude range controls the gain or attenuation of the input amplifiers - that is, whether the input signal is increased in size (amplified) or made it smaller (attenuated), as shown in Figure 3. In this way, the signal is "scaled" so that it can be displayed at the size you want.
Sometimes you will want to increase the sensitivity (amplification), "zooming" into a signal - for example, when you are looking for an imperfection on the rising edge of a pulse waveform. (Watch out that you don't increase the sensitivity so much that the trace extends beyond the display top or bottom edges. You could inadvertently cause the input amplifiers to saturate, making the waveform look distorted.)
Analog-to-Digital Conversion
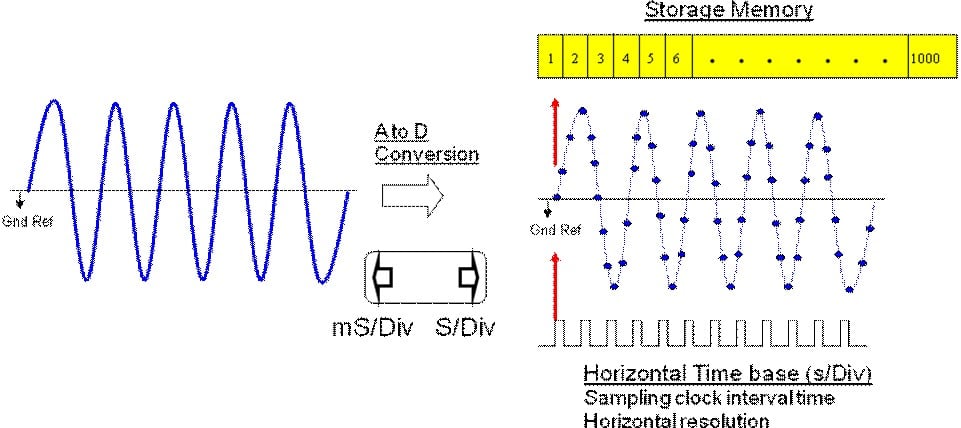
As we discussed in Part 1 of this series, an oscilloscope uses high speed analog-to-digital conversion techniques to sample an input signal, the objective being to digitize the input waveform as quickly as possible, because the faster the signal is sampled, the higher its resolution on the horizontal (time) axis. (See Figure 4.)
Problems can occur if a signal is under-sampled (that is, not sampled fast enough). These problems include:
- Aliasing If you only sample a sine wave once or twice per period, the resultant displayed waveform will look very different from the original sine wave - more like a triangular wave.
- Transients or glitches can go un-detected.
- Reduction in displayed frequency or bandwidth, potentially impacting the level of noise displayed (such as when we were looking earlier for high frequency AC noise in the output of a DC power supply)
To minimize these problems and to reproduce the waveform as accurately as possible on a display, the oscilloscope must sample the input as quickly as possible - within reasonable cost, of course!
Sample rate and memory
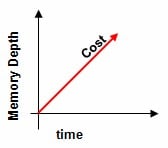
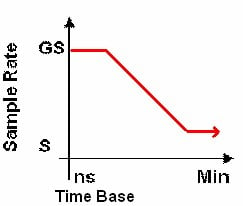
A key aspect of digital storage oscilloscopes that must be considered is the sample rate versus memory depth and its impact on the acquisition process. (See Figure 5.) Consider, for example, an oscilloscope with a sample rate of 1 gigasample per second (1GS/s, or 1 billion samples per second). With the oscilloscope's time base set to 100 milliseconds per division, and with 10 divisions in the display and a total display time of 1 second, and sampling at 1 billion times per second, the oscilloscope would require 1 billion points of memory!
Due to both cost and memory writing speeds, this is not practical! With a more practical (and affordable!) 1,000-point memory, the sampling interval would be reduced to 1,000 samples per second (1kS/s).
A/D - Glitch Detection
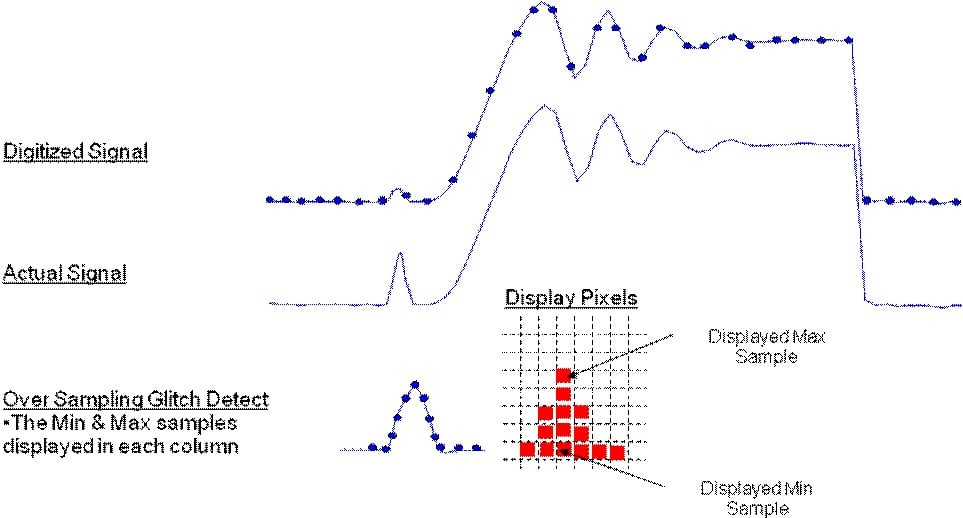
Glitch detection is a technique used to overcome the two critical errors encountered with digital ADCs: aliasing and missed transients (see Figure 6).
In some oscilloscopes, the glitch detector is essentially a second ADC that runs continuously, buffering sample points in memory so the microprocessor can capture all the minimum and maximum sample values over time.
Since the oscilloscope only stores and uses the minimum and maximum points, we limit the amount of memory needed but still capture any transients and over-sample the signal, preventing the display of an aliased waveform.
Oscilloscope Bandwidth
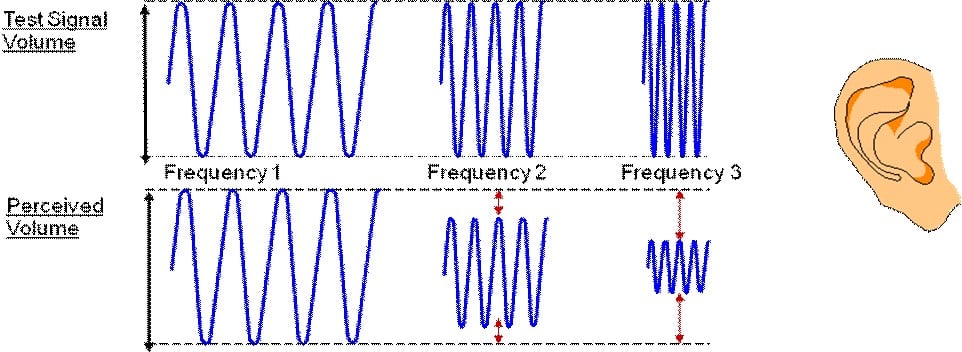
One of the most important specifications of an oscilloscope is its bandwidth. Like the human ear, electronic equipment such as oscilloscopes has limits beyond which they can no longer "hear" a signal. (See Figure 7.)
For example, imagine that you went for a hearing test. You put on a pair of headphones and the technician adjusts the volume of a test signal so you can hear it clearly. Next, the technician slowly increases the frequency (pitch) of the signal without changing the volume. At some point, your ears will tell you that the volume has decreased even though it has not. As the frequency gets higher still - exceeding your "hearing bandwidth" - you will eventually be unable to hear the signal at all.
The frequency at which the oscilloscope indicates that the input has decreased in amplitude (volume) by 3dB (about 30%) is called its bandwidth. Essentially, bandwidth is a way to state the performance of the electronic circuitry inside the oscilloscope (that is, its amplifiers, attenuators, and so on).
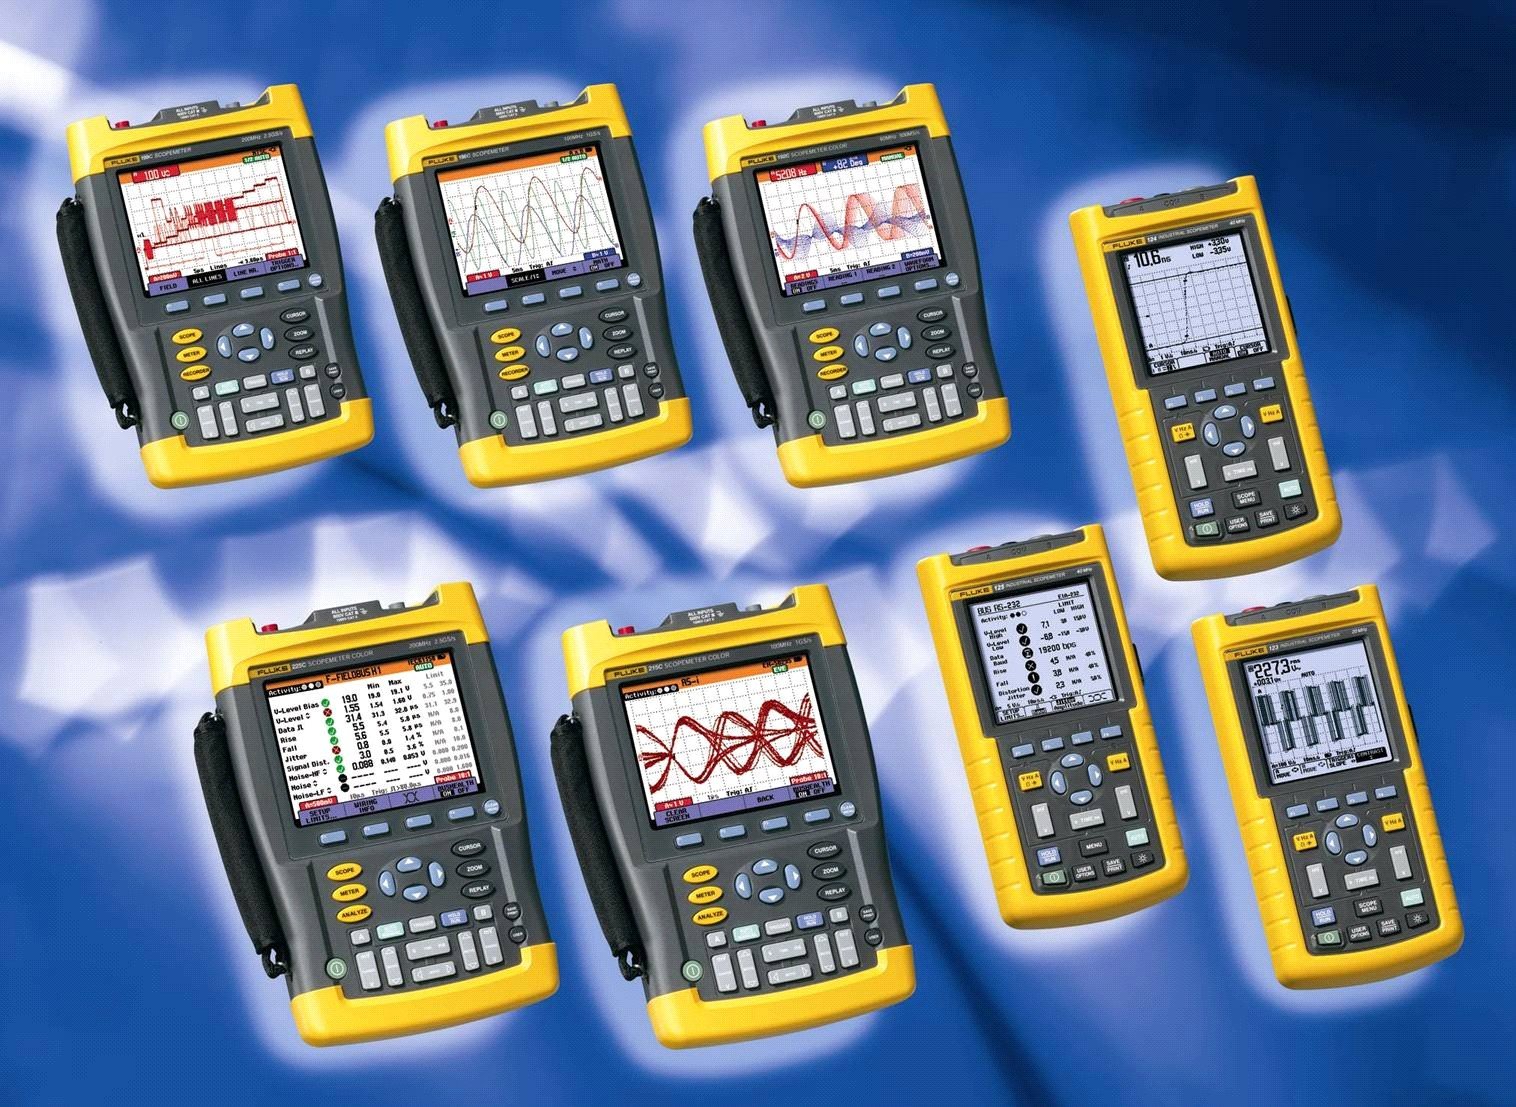
Fluke Oscilloscopes
The concepts and techniques presented here can be found in the Fluke range of portable oscilloscopes. The Fluke ScopeMeters are available with bandwidths from 20 MHz, to 200 MHz, with enough performance and features to tackle a wide variety of routine measurements or even extreme tasks such as finding random events
Fluke oscilloscopes are specifically designed to operate in harsh environments out of a lab away from a bench.
- ABCs of Portable Oscilloscopes: Part 1, Multimeters and Oscilloscopes
- ABCs of Portable Oscilloscopes: Part 3, Triggering and Isolation
- ABCs of Portable Oscilloscopes: Part 4, Capturing and Analyzing Waveforms
- ABCs of Portable Oscilloscopes: Part 5, Capturing Intermittent and Random Events with a Portable Oscilloscope