A pressure transducer is a Pressure to Current (or P to I) device used to convert pneumatic analog loop control signals of 3-15 PSI or other measured pressures to electrical loop analog control signals of 4-20 mA. Pressure transducers are one of two parts in most field instruments—the other is a primary element, such as flow tubes, orifice plates, pressure sensors, and more. Transducers process the signal generated by the primary element, first characterizing it in linear format and applying engineering unit coefficients to it, before then transmitting it in analog mA.

Why pressure transducer calibration is important
The performance of pressure transducers is critical to a process plant’s control systems and are often installed in harsh operating environments causing their performance to shift or change over time. To prevent pressure transducer failure and keep these devices operating within expected limits requires periodic verification, maintenance, and calibration.
In addition to maintaining the performance of the pressure transducer, proper calibration ensures ISO/IEC 17025 facilities continue to generate valid results.
How to calibrate a pressure transducer
The device used in this example is a P to I with pressure input valves of 3-15 PSI for 0% and 100% with output range (drawn from loop power) of 1-5 mV for 0% and 100%, +/- 2%. This step-by-step example includes 1) performing a three-point ascending (3↑) As Found (pre-adjustment) test at 0-50-100%, and tagging the results, 2) adjusting the zero and span (100%) of the P to I, then 3) performing a three-point ascending As Left (post-adjustment) test at 0-50-100%, and tagging those results with the Fluke 754 Documenting Process Calibrator.
Step 1. Connect the pressure module to the 754 DPC. Connect the input of the P to I and the output of a pressure hand pump to the input of the pressure module using a “T” connector (Figure 1). If you are using a differential pressure module, ensure (for this example) it is a 15 PSI module and connect to input labeled “H.”
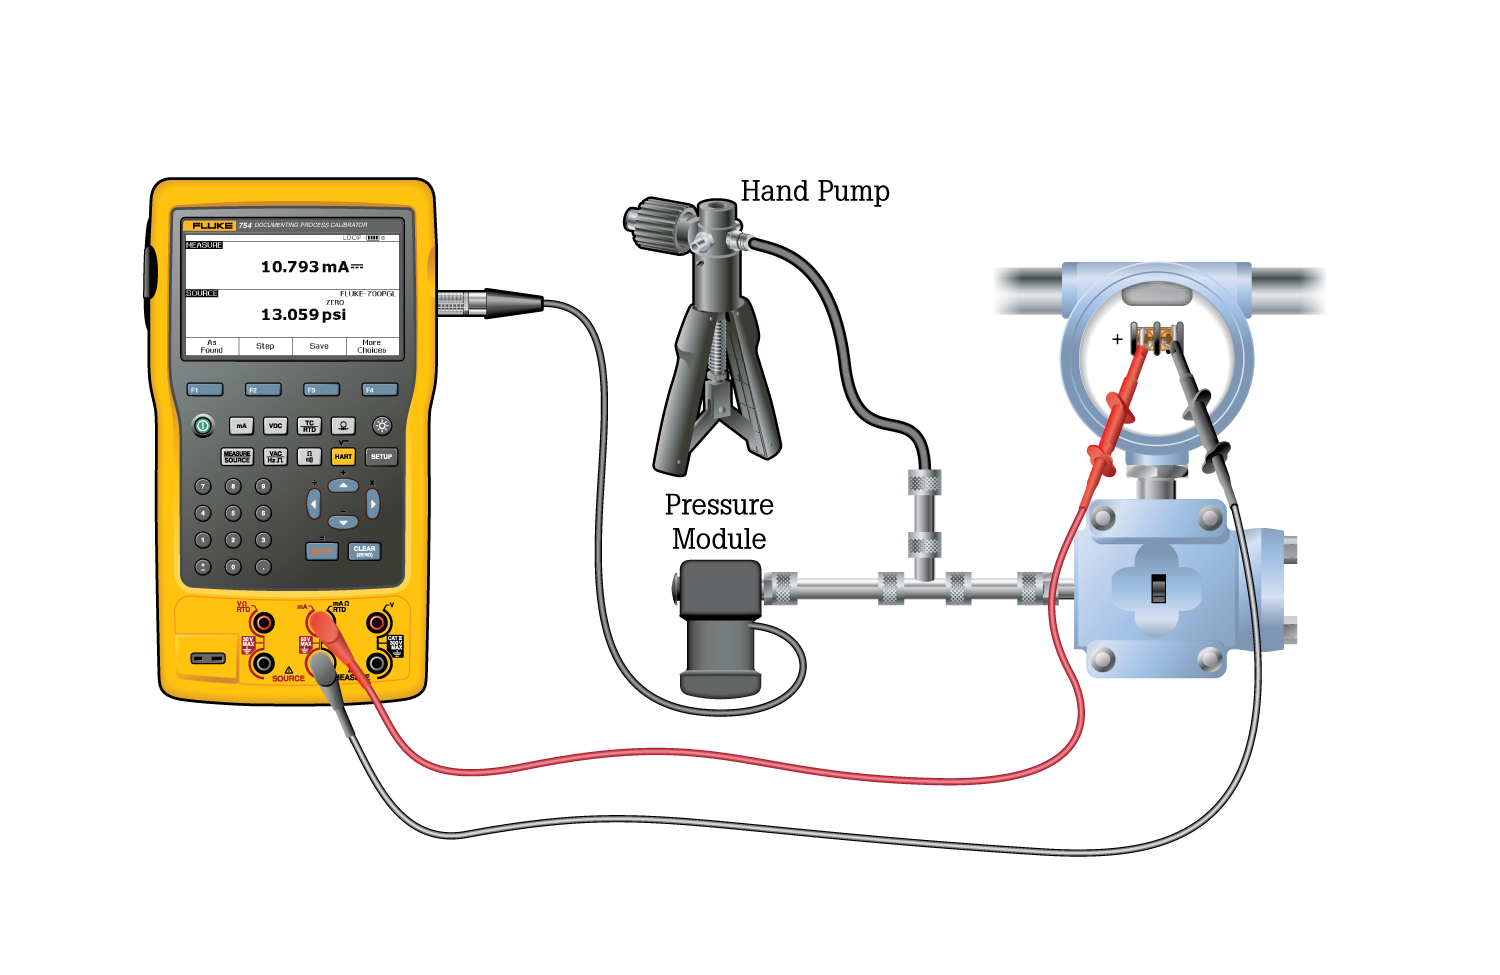 Figure 1
Step 2. Connect from the center 2 banana type connections of the DPC to the input of the P to I where loop power is supplied (Figure 1).
Step 3. Next, depress the “SETUP” button on the DPC. The cursor should begin on loop power. Depress “ENTER,” down arrow to Enabled, and depress “ENTER.” Next depress the “DONE” soft key.
Step 4. Once your connections are made, assuming you are in the power up state (or measure screen), select the mA button.
Step 5. Next, depress the “MEAS/SOURCE” button; now you are in the source screen (Figure 2).
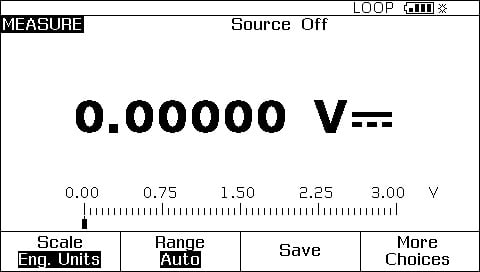 Figure 2
Step 6. Since we wish to source a pressure (using a hand pump) depress the “PRESSURE” button (directly above the HART ) (Figure 3).
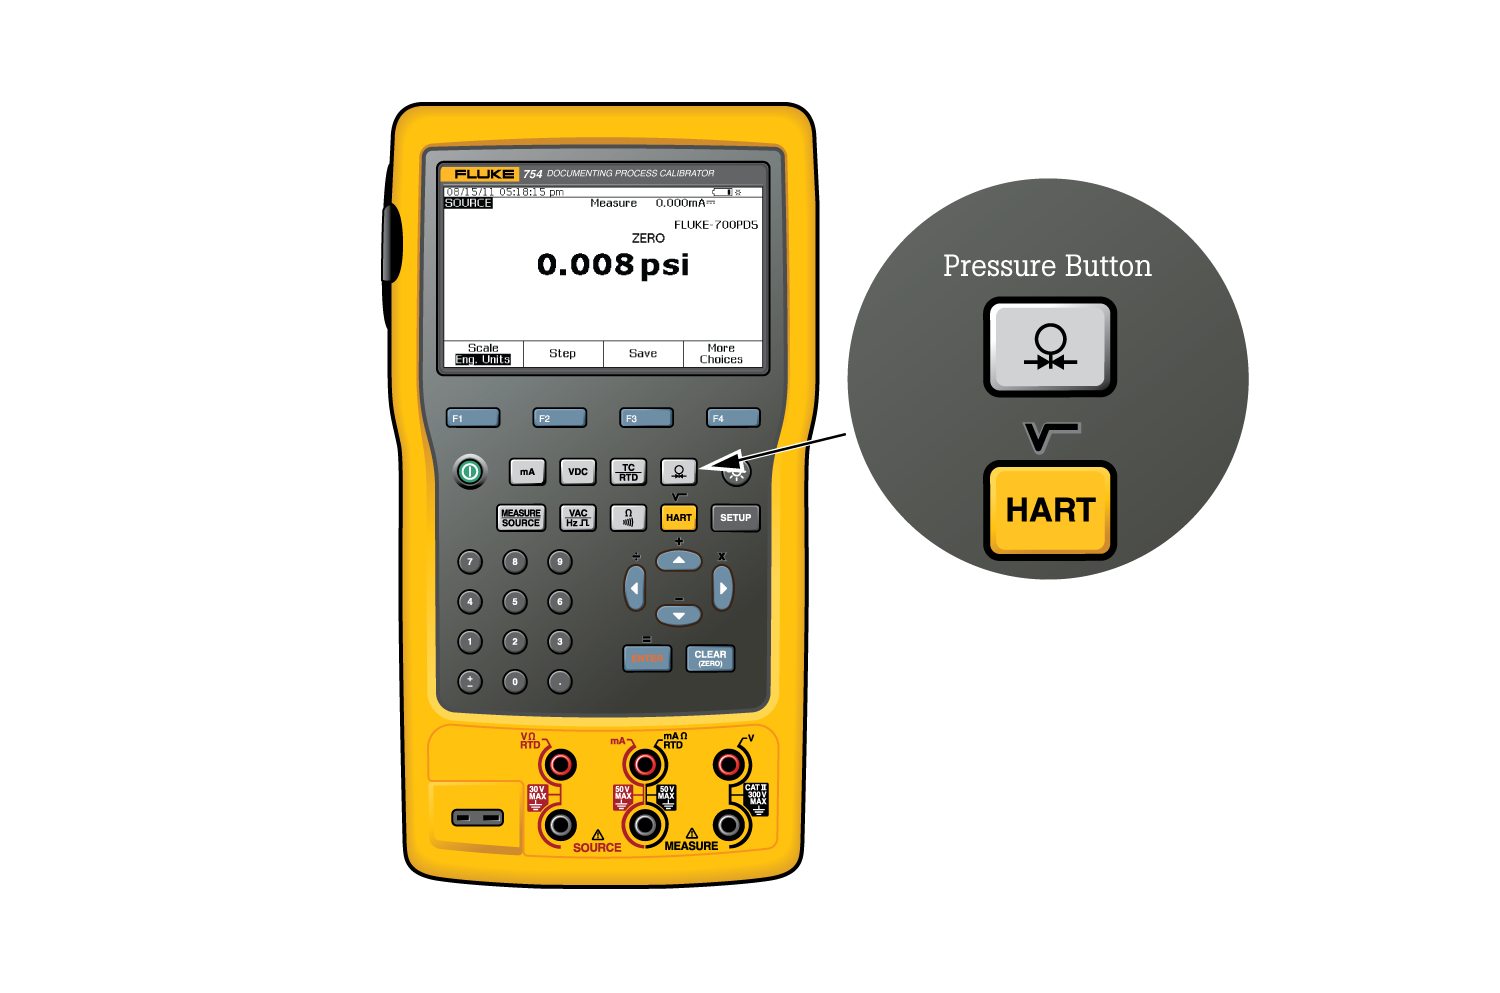 Figure 3
Step 7. Next, depress the “MEAS/SOURCE” button once and you should be in the split screen mode (Figure 4).
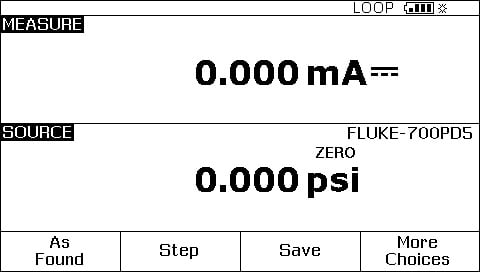
Step 8. At this point, depress “As Found,” select “INSTRUMENT” and press “ENTER,” then fill in the template per Figure 5.
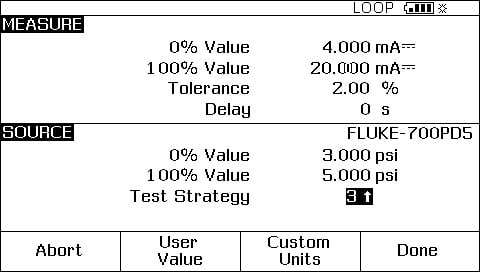
Depress “DONE.” You should now see the split screen and are presented with soft key choices of “ABORT,” “AUTO TEST,” and “MANUAL TEST.”
Step 9. Select “MANUAL TEST,” and watch the DPC for the prompt: “Go to 3 PSI” (Figure 6).
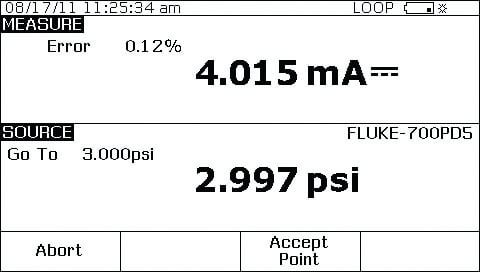
At this point, using the hand pump, pump until the DPC display is reasonably close to 3 PSI and depress “ACCEPT POINT.” Now the DPC should display “Go to 9 PSI.” Again, using the hand pump, pump up reasonably close to 9 PSI and depress “ACCEPT POINT.” When the DPC responds with “Go to 15 PSI,” pump to that value and “ACCEPT POINT.”
It is important to understand a key feature of the DPC at this point. When the error is being calculated on the measured mA by the DPC, it will make the calculation based on the deviation of the amount of pressure being sourced. What this means is, if you are sourcing 3.120 PSI (1% of span above nominal), the DPC will look for a mA reading of 4.160 mA (also 1% of span above nominal). In order to make a proper evaluation of the device, you need only to get reasonably close to the nominal pressure values with the hand pump. The remaining source pressure error is compensated for by the DPC during mA measure calculations.
Step 10. Once the DPC has completed this evaluation, it will display the post-test summary screen with the SOURCE, MEASURE, and ERROR columns (Figure 7).
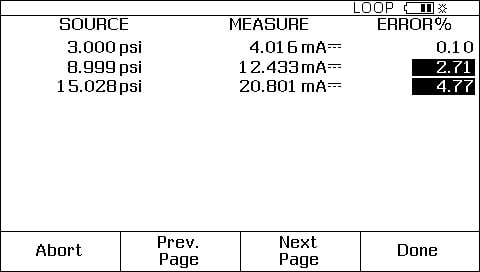
Step 11. Now you are presented with the Tag entry screen (Figure 8).

Press the “ENTER” key to edit the entries, press “DONE” when complete until the split screen reappears with the soft key options of “AS LEFT,” “ADJUST,” “SAVE,” and “MORE CHOICES.”
Step 12. At this point, select “ADJUST” and the DPC will source 0%, instruct you to “Go to 3 PSI” and measure for 4 mA to 2%. As long as the error exceeds 2% the Error window in the measure half of the screen will be in reverse video. Adjust the zero on the P to I until the error is less than 2%. Next, select “Go to 100%” and adjust span in the same way.
Step 13. After adjustment is complete, select “AS LEFT,” “DONE,” and “MANUAL TEST” and repeat step 9. If the adjustment was successful, all the errors in the post run summary should be in normal video (Figure 9).
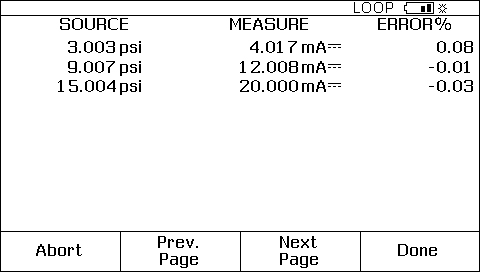
Step 14. Select “DONE,” “DONE,” and “DONE” again and you are done!
The pressure transducer calibration certificate
Calibration certification provides traceability and identifies the quality of the pressure transducer over time. The certificate is necessary for maintaining good standing as an ISO/IEC 17025 facility and it also provides others, including collaborators and customers, with a verification of data validity and quality. Here are the primary elements that must be included in your pressure transducer calibration certificate:
- Header information: The company logo is on the right and the laboratory accreditation body logo is on the left. They are proportionally the same size and based on corporate brand standards.
- Report title: “Certificate of Calibration” is preferred to “Report of Calibration.”
- Laboratory location name: This is placed immediately under the title.
- Unit under test information
- Description
- Manufacturer (as identified in the instrument)
- Model number
- Serial number
- Information related to the calibration event
- Issue date (when the certificate was issued)
- Unique certificate number
- Date of calibration
- Calibration due date (may be left blank if not known)
- Environmental conditions (based on the conditions in which the calibration took place, usually in SI units and can be suppressed if not relevant to the calibration)
- Calibration statement that identifies the specific traceability requirement of the calibration event. For example, ISO 17025 requires facilities be traceable to the International System of Units (SI), which can be realized through ap appropriately recognized National Measurement Institute (NMI), such as NIST in the U.S., PTB in Germany, or NIM in China.
Page 2 onward – This is the actual report, so some of the information from the cover page will be repeated.
- Standards information (in table format)
- Specific instruments used
- Description of the device (i.e., manufacturer and model number)
- Date of calibration
- Calibration date due for the instrument
- Calibration data (in table format)
- Parameters (e.g., Resistance, DC Volts Measurement Verification)
- Actual value
- Measured value
- Absolute error
- Test tolerance
- Expanded uncertainty
The calibration certificate should include a calibration sticker, signature area, the address and phone number of the laboratory accreditation body, page numbers and total number of pages (i.e., page 1 of 7), and revision dates.
Pressure transducer calibration service
For pressure transducer calibration service, look to one of many third-party calibration labs. If several instruments need calibration, consider the business case and ROI for purchasing a calibrator and performing the calibrations in house.