Would it be fightin' words to say that most of the time, motors run just fine? Because really, as maintenance professionals, we have a good grasp of the expected performance of our mechanical systems, we're checking them out for one reason or another on a somewhat regular basis, we're more-or-less aware of the loads they're running, and we're paying attention to their lifecycle - either through that ticker in the back of our head or through a more formal maintenance management program.
So if it's that easy, what keeps us employed? A lot of the time, it's the changes to the system that monkey-wrench older components. And then, stuff just breaks. Contrary to the casual tone taken here, most of us take great pride in keep things up and running, and we really don't like surprises, especially the kind that make our phones ring after hours.
That's where the importance of measurement comes in. If we're doing all of those other parts of our job described above, such that we have a pretty good mental handle on the health of our mechanical equipment, then what's left is the physical data that confirms what we think we know or surprises us with conditions we didn't know were building.
"They can help you troubleshoot the root cause of just about any motor problem"
Thermal, vibration, insulation resistance, and electrical measurements are all pretty quick and easy to capture, using handheld tools, and they tell you a lot about system performance. What's especially interesting is that these four tests each provide information about different aspects of the system. The measurements overlap and relate in such a way that, taken in conjunction with one another, they can help you troubleshoot the root cause of just about any motor problem.
Plus, the measurements can be saved and stored centrally for everyone on the team to access, enabling multiple different people (not just you) to respond to that late night call.
Never leave home without it

Without what? Your common sense and safe electrical measurement knowledge! Where at all possible, shut it down and then Lock Out and Tag Out. Wireless meters now enable you to shut the system down, lock out, hook up a meter, close the panel door, re-engage, and start monitoring measurements. But not everything can be shut down.
If a situation arises that requires working it live, make sure to follow these essential safety practices. First, know the arc flash rating of your electrical environment. Second, be sure to wear appropriately rated personal protective equipment (PPE) for that environment. Third, use a test instrument that is safety rated for the environment. Fourth, use a meter to verify live or not live and then use the three-point test method to verify that your meter is working properly: Test a known live circuit; test the target circuit; and test the live circuit again.
1. Thermal

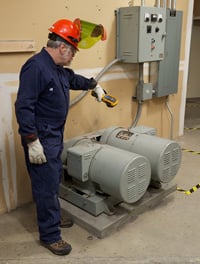
Speaking of safety, when dealing with operational equipment, start with a thermal inspection. You will still need to wear PPE - reference 70E for the specific gear required for noncontact inspections - but it's less dangerous to be several feet away and the thermal picture view shows you at a glance what kind of heat signature the system is giving off. Is it normal? Compare to a similar system or to a previous image to make that determination. Differences in temperature will help you build a quick list of what to measure first with your other measurement tools.
High temperatures in and of themselves don't necessarily mean anything, but a component with a higher temperature than similar components, or a rise in temperature, might well have something amiss. For example, a coupling that is running warm could indicate misalignment. A motor's heat signature will tell you a lot about its quality and condition. If a motor is overheating, the windings will rapidly deteriorate. In fact, every increase of 10 °C on a motor's windings above its design operating temperature cuts the life of its windings' insulation by 50 percent, even if the overheating is only temporary.
On the electrical side, check for phase unbalance, bad connections, and abnormal heating on the electrical supply. On the mechanical side, infrared can often detect shaft bearings issues - the bearings tend to run hot for several days before fully failing. Motor case temperature can also be a good measurement point. However, to correctly interpret motor case temperature, you must first know what the norm is. Make it a habit to take temperature measurements of your motors when they are running well, so that you have a baseline for comparison.
While an infrared camera is ideal for inspection work, since it provides an infrared view of the entire electromechanical system, an infrared thermometer works just fine for quick and easy spot temperature comparisons, and is much easier to carry around. Simply press the trigger to take the first measurement, save it, refocus and take a second measurement, and then compare. A visual IR thermometer provides a digital image with a heat map overlay to provide context, helping you find the exact location of extra heat.
2. Vibration

Common wisdom in the maintenance world dictates that the majority of mechanical failures with rotating machines come from four faults: unbalance, misalignment, roller bearing problems, and looseness.
- Roller bearings account for up to 60 percent of machine failures
- Unbalance accounts for up to 50 percent of machine failures
- Misalignment accounts for up to 45 percent of machine failures
How can the numbers add up to over 100 percent? Because unbalance and misalignment can both lead to roller bearing wear and early failure.
What not everyone knows is that vibration is one of the earliest indicators of machine health. Yes, thermal imaging will show you when a problem has gotten bad enough to cause overheating. Vibration, however, is far more sensitive and can detect an issue much earlier than thermal inspection, long before components are damaged. These days, people are also thinking about machine efficiency. When machinery is misaligned, friction starts to eat up not just the hardware but also the electrical supply, creating more than one reason to take a reading every so often.
When mechanical faults arise, instead of just replacing bearings, take the extra time to determine the root cause of the fault. Once the machine is properly aligned and the shafts balanced, the bearings will have much less strain on them and will last for years.
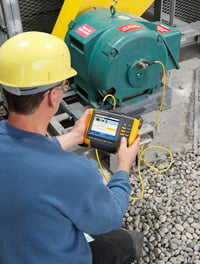
Handheld vibration meters and testers make all of this much easier and quicker than it used to be. The handheld tools carry a database of good/bad readings, dynamically compare vibration signals, and can even give you a diagnosis on the spot, depending on the sophistication of the tool. It used to be that only predictive maintenance/reliability specialists did vibration analysis. Now technicians can carry a vibration meter into the field with them for good/bad spot checks and senior technicians can easily train up to using the diagnostic version. That significantly enhances a maintenance team's understanding of the overall machine health and bearing condition - and once again, the data can be shared and stored.
3. Insulation

Insation problems on motors and drives are usually caused by excessive heat, improper installation, environmental contamination, mechanical stress, or age. Insulation testing can easily be combined with regular motor maintenance (to identify degradation before failure), and with installation procedures (to verify system safety and performance). When troubleshooting, insulation resistance testing can be the missing link that enables you to get a motor back into operation the easy way, by simply replacing a cable.
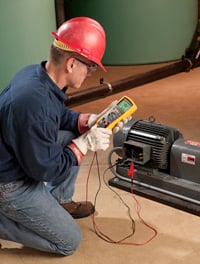
An insulation multimeter like the Fluke 1587 combines the function of insulation resistance testing with all of the most common digital multimeter functions. For a technician with a lot of motors on his beat, this makes it the go-to tool for performing most of the tests needed to troubleshoot and maintain motors. When a motor is having problems, check the supply voltage and then use the ohms function to measure the motor winding resistance phase to phase. Next use the insulation resistance function of the meter to measure the line and load conductors to ground and motor windings to ground.
By measuring the insulation resistance of motor windings, you can detect deterioration caused by heat, age, corrosion, dirt, moisture, and excessive vibration before the motor fails. Because insulation resistance varies with temperature and humidity, you may need to take several resistance measurements over a period of time to get an accurate result. Periodic insulation resistance measurements will tell you how healthy your motors are, and when to replace or rewind them.
4. Electrical
Current unbalance is a common root cause of motor overheating. Current unbalance can be caused by several different things, including power delivery problems, low voltage on one leg, or insulation resistance breakdown inside the motor windings. The worst-case scenario of current unbalance, single phasing, is when one entire phase is lost and the fuse is blown.
To test for current unbalance, use an ac current clamp meter to check the current draw on each of the three legs. To determine average current, sum the current from all three phases and then divide by three. After that, subtract the current average from the largest measurement to find the current deviation. Use the formula below to determine current unbalance. Current unbalance should not be greater than 10 percent.
( Iu = current unbalance in %; Id = current deviation in amps; Ia = current average in amps)
lu = (Id / la)*100
The best measurement tool to detect single phasing is the clamp meter: a zero current measurement in one phase is a clear indication of power loss. However, a voltage measurement on the same phase can be misleading, because of induced current from the two remaining live phases. A "ghost voltage" reading around two live circuits is not uncommon.
To verify whether a fuse is blown, remove the fuse from the circuit and use the resistance function on a digital multimeter (DMM) or a clamp meter to check the fuse. Once the fuse has been removed from the circuit, place the multimeter or clamp meter in the ohms (Ω) function. Place the test probes at each end of the fuse. A good fuse will measure as a very low resistance (fewer than 10 ohms). An open fuse will show as an "OL" in the meter display. Check and double-check your measurements: many troubleshooters have been fooled by assuming they know the real cause. Don't jump to a conclusion before testing all circuit elements.
How measurement is like an elephant
Combining thermal, vibration, insulation, and electrical testing is kind of like that allegory about the blind men and the elephant. (Depending on which part of the elephant the different blind men touched, they thought it was different things.) You need the entire operational picture. With four types of testing, used together, you not only probably have everything you need for right now, but you, your team, and your equipment have the proactive data to run much more efficiently for months to come. Keep those electrical measurements, thermal images, insulation resistance readings, and vibration test results stored and accessible, as a baseline for future maintenance or troubleshooting - having a place to start from shortens the time on task, significantly.
Many factors go in to the decision whether to repair or replace a motor: cost of the repair, cost of the new motor, expected lifespan, availability of a new motor, and efficiency of the exiting motor. If the cost of a motor repair exceeds 50 percent of its replacement cost, a new motor would be purchased. With your measurement data, now you have the efficiency and lifecycle parts of the equation.
Four Must-Have Measurement Practices for the Mechanical Maintenance Team (.pdf)