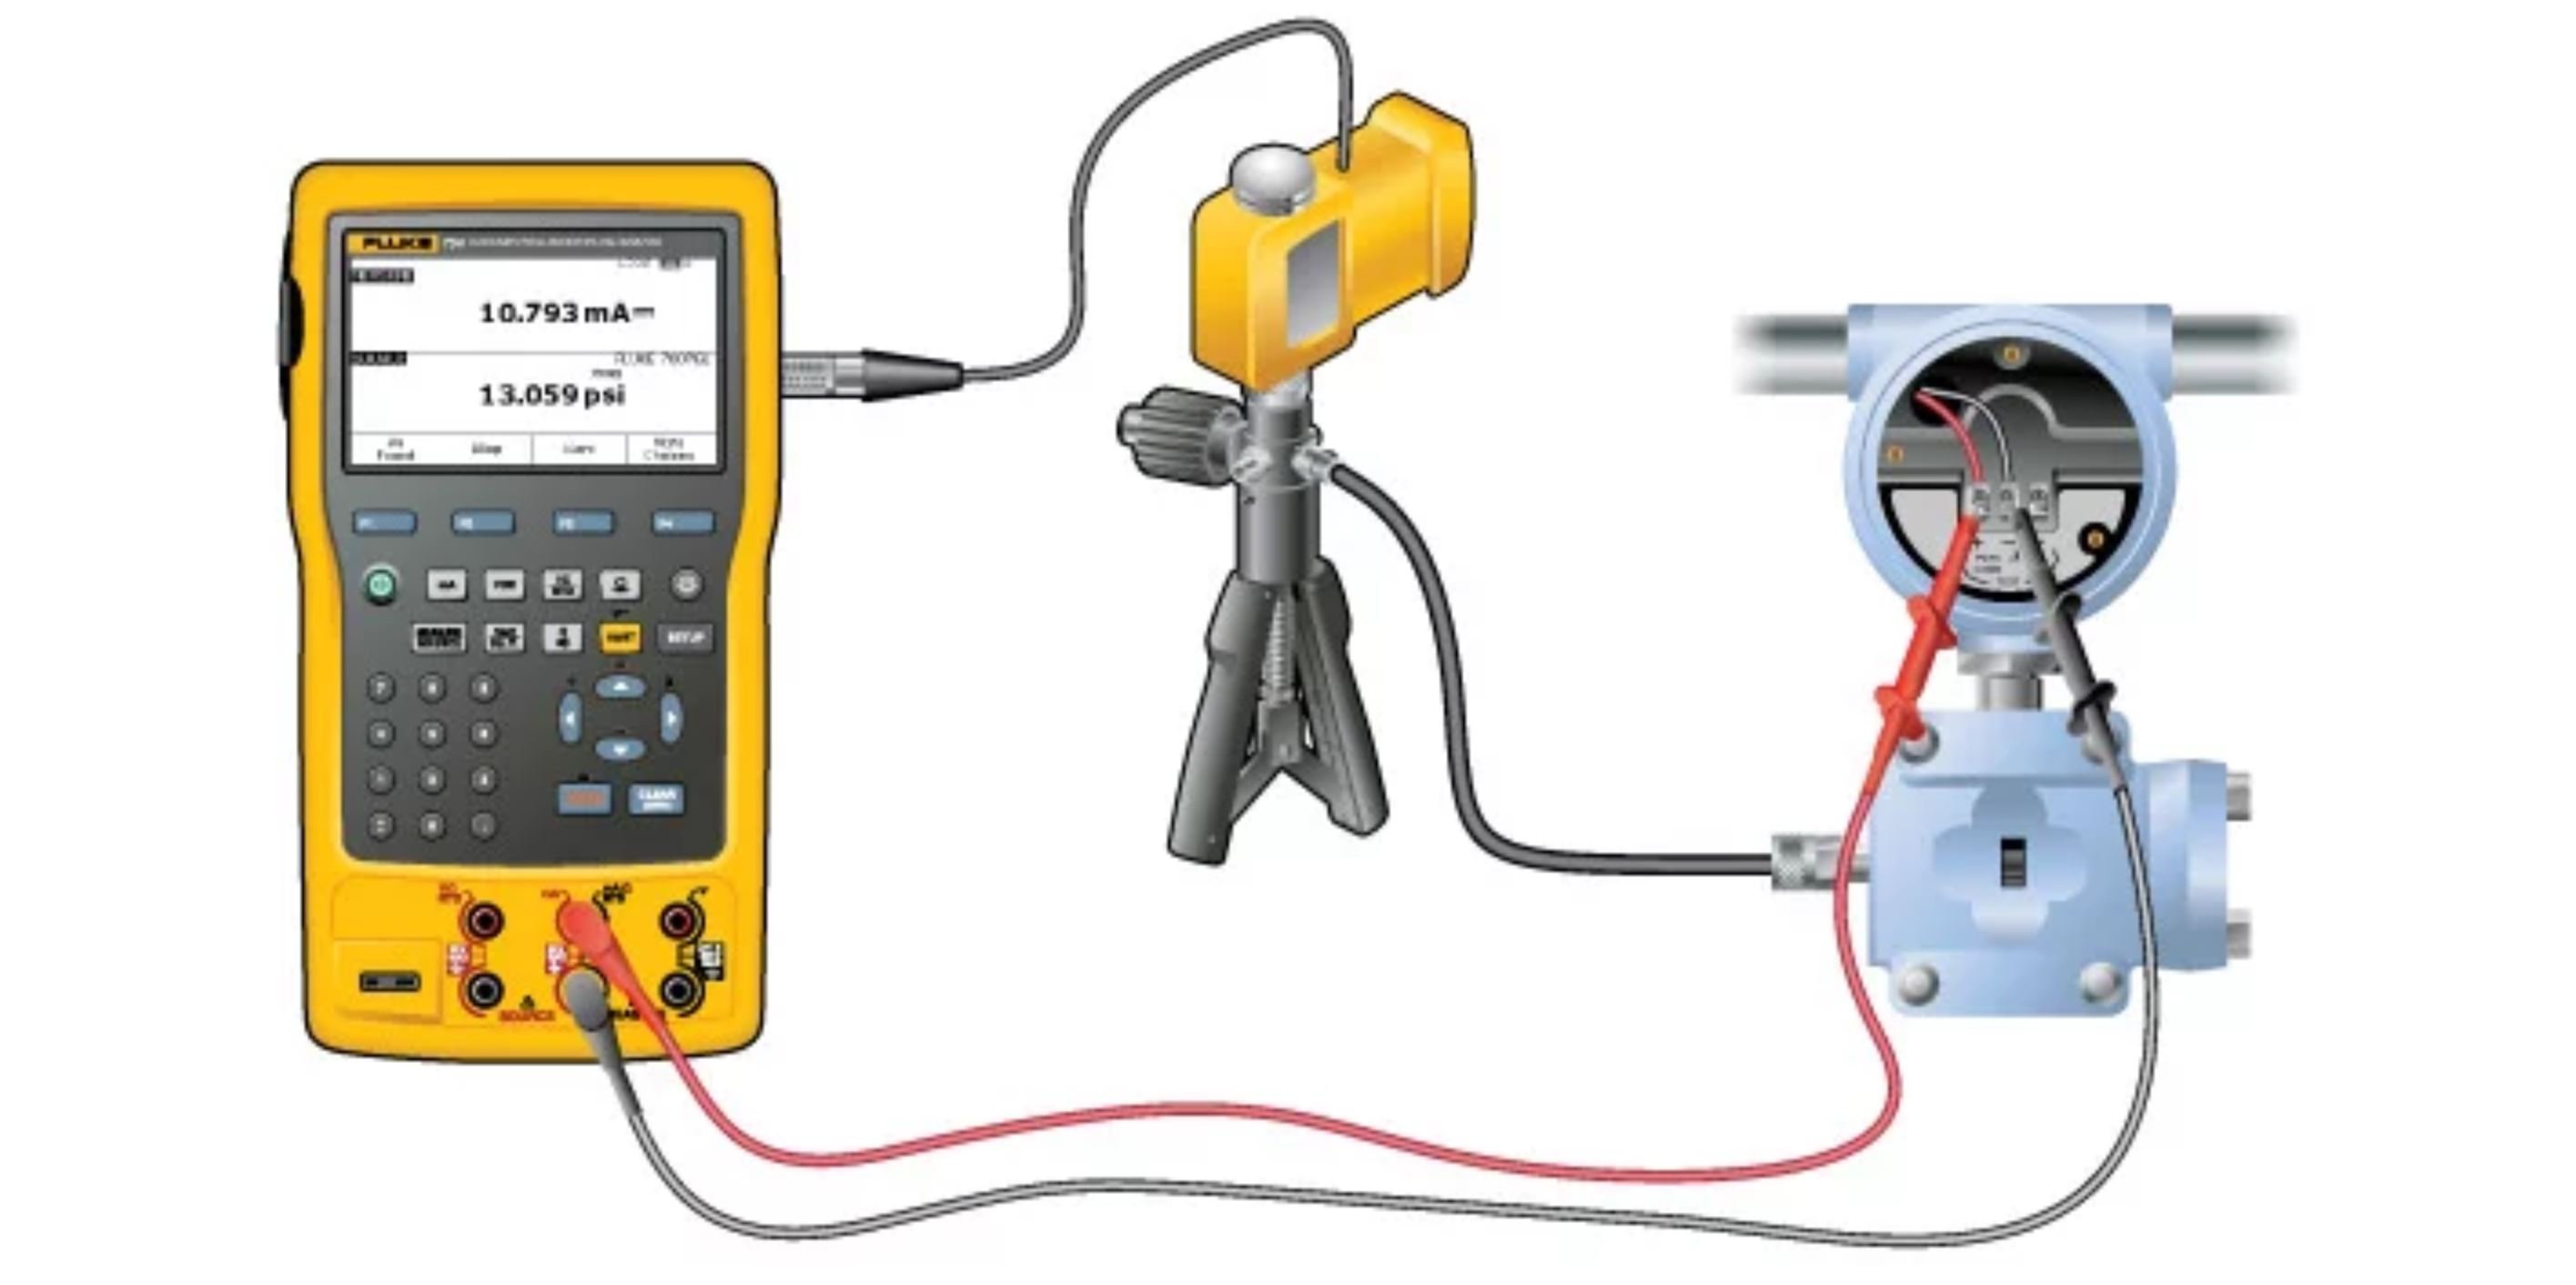
Pressure transmitter manufacturers have improved the accuracy and technology designed into these smart pressure measurement devices. Many conventional calibration tools have become inadequate or simply unable to test and calibrate these high accuracy pressure transmitters. Better test solutions are required.

Verifying and documenting the performance and adjusting a HART communicator enabled pressure transmitter can require a bucket full of tools. Performing this task with a HART enabled calibrator like the Fluke 754 Documenting Process Calibrator with HART Communication simplifies the task and reduces what you need to carry.
Before going to the field, install the pressure module adapter to the hand pump with thread seal. Once the adapter is properly installed on the pump, changing modules to different pressure ranges is a snap, no tools required.
To get the accuracy needed to test these new high accuracy transmitters, match the pressure measurement standard range closely to the device tested. For example, use a 100-psi pressure module to calibrate and test a transmitter ranged at 100 psi. Industry standards suggest the measurement standard should be 4-10 times more accurate than the device being tested, so best-in-class accuracy is required.
The Fluke 750P series pressure module has the HART communication functionality built in to enable smart trims on transmitters. It can also document transmitter performance before and after adjustment and calculate pass/fail errors.
How to perform the test
- Isolate the transmitter from the process being measure and its loop wiring. If measuring the mA signal across the transmitter test diode leave the wires intact but note this method does not give the best mA measurement accuracy.
- Connect the mA measurement jacks of the 754 to the transmitter.
- Connect the pressure module cable to the 754 and connect the transmitter test hose from the hand pump to the transmitter.
- Press the HART button on the calibrator to see the configuration of the transmitter.
- Press HART again and the calibrator will offer the correct measure/source combination for the test. If documenting the calibration press As Found, input the test tolerance and follow the prompts. If the measured mA signal at the test points is found within tolerance the test is complete. If not, adjustment is required.
- Select, adjust, and trim the pressure zero, mA output signal and input sensor.
- After adjustment select As-Left, document the condition of the transmitter and after adjustment and if the test passes, it is complete.